Wiring the sBitx v3 Board kit
The sBitx v3 board is a single palette design that holds a full 25 watts SDR radio. It has its heatsink attached to the PCB and it can be wired quickly to become a functioning SDR.
Watch the video:
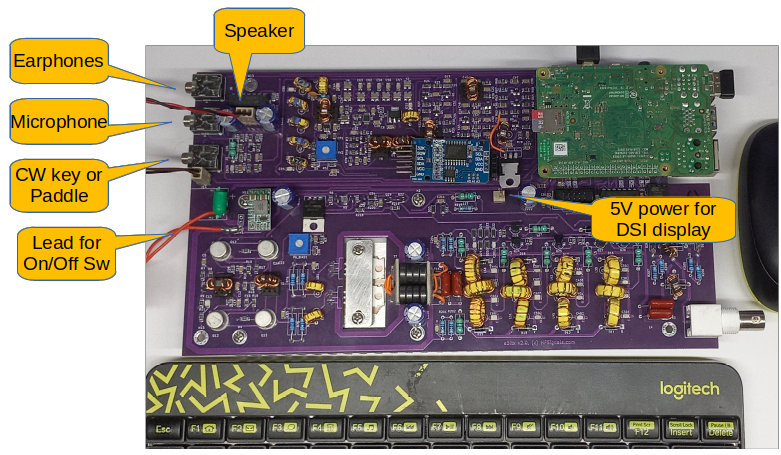
- Power. You can supply between 12 to 13.8 v DC power to the sBitx board. An XT60 connector is supplied in the kit to mate with the on-board XT60 socket. Do not exceed 13.8V as it can potentially blow the power amplifiers FETs.
- Speaker. A 3 pin supplied connector is used to connect an external speaker to the board. Use pins 1 and 3 as the speaker leads. Alternatively, the earphone jack is available with just enough power for earphone/headphones.
- Internal Mic. In addition to the microphone jack, the sBitx board also has provision for an internal microphone from J14 located right next to the keyer jack. This automatically disconnects when an external microphone is attached.
- If you are going to attach the official Raspberry Pi touch display, use the ribbon cable provided in the display box to connect between the display and the Raspberry Pi.
Those using a regular HDMI display panel can use the HDMI port of their Raspberry Pi.
5. Insert the supplied SD card with the sBitx image on it.